How To – OAUTH Setup for OIC Integration Rest APIs invocation – OIC Gen 3
Introduction
Starting OIC Gen 3, calling Oracle-provided Integration Rest APIs does not support Basic OAuth. We would use those integration APIs for automation like deployment, stopping/starting schedules, or lookup syncs.
This is a quick reference on how to use OAUTH for invoking the Integration Rest APIs
Integration Rest API supports OAuth authentication with Authorization Code grant type. This type of authentication is used for client applications that can access a browser. You don’t need to share usernames and passwords with clients or manage expired user passwords. This document does not cover the mechanics of how the OAuth authorization code credentials flow works but the steps needed within OIC to enable the service. You can get the OAuth flow information from this link.
Configure Confidential Application
Before using the REST API with OAuth in Oracle Integration, you must register your Oracle Integration instance as a trusted application in Oracle Identity Cloud Service. Register a trusted application for every Oracle Integration instance you want to access through the REST API. It would be best to have Identity Domain Administrator or Application Administrator credentials to perform this task.
- Navigate -> Identity & Security -> Domains (Switch the root compartment) -> Integrated Applications

- Click on Add Application
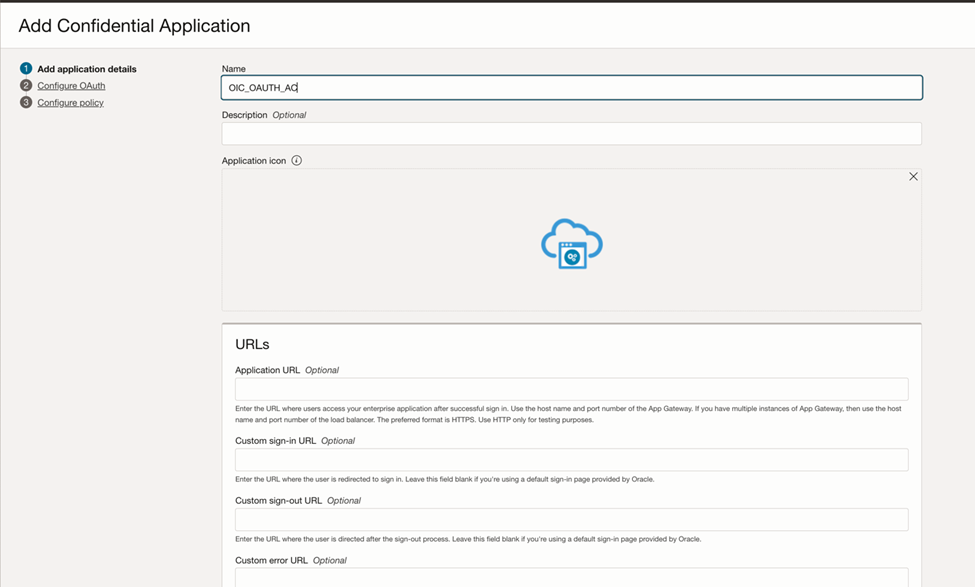
- Select “Confidential Application” as the type of application.
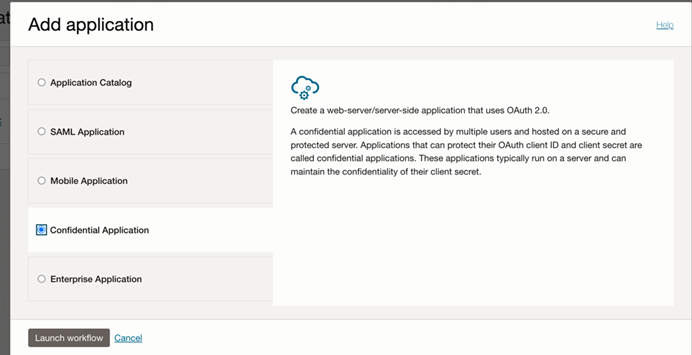
- Enter the Application Name and click Next.
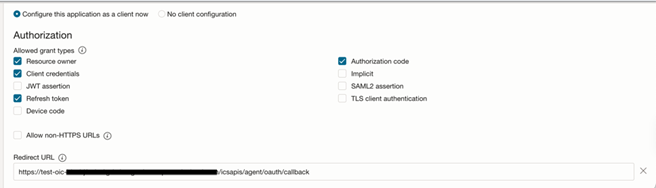
- Select Configure this application as a client now
- On the Authorization page, select the following fields:
- In Allowed Grant Types, select Refresh Token, Authorization Code, and Client Credentials. Make sure you select Refresh Token because otherwise, clients cannot refresh expired tokens.
- In Redirect URL, specify the application URL where responses to authentication requests are sent. This is the callback URL for your application, where the authorization code and authorization token will be sent. (Note it is your OIC URI followed by /icsapis/agent/oauth/callback)
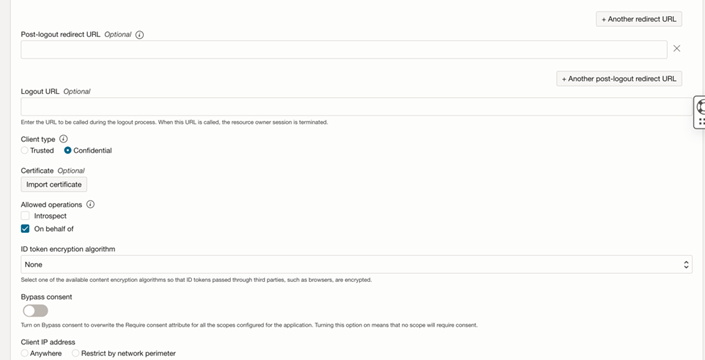
- In Client Type, select Confidential.
- In Allowed Operations, select On behalf Of. This allows the trusted application to get a token and create a token on behalf of the user who is logged in.
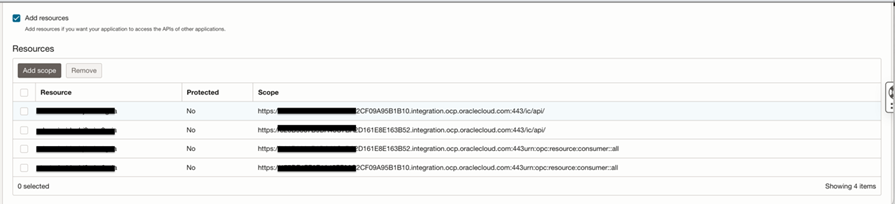
- In Accessing APIs from Other Applications, select Allowed Scopes. This specifies which resources the trusted application can access. In Allowed Scopes, click Add, and select your Oracle Integration instance from the list. Your instance name will be the instance ID. Click Add.
- Click Next and skip sections until you get to Finish.
- Note down the client ID and Client Secret.
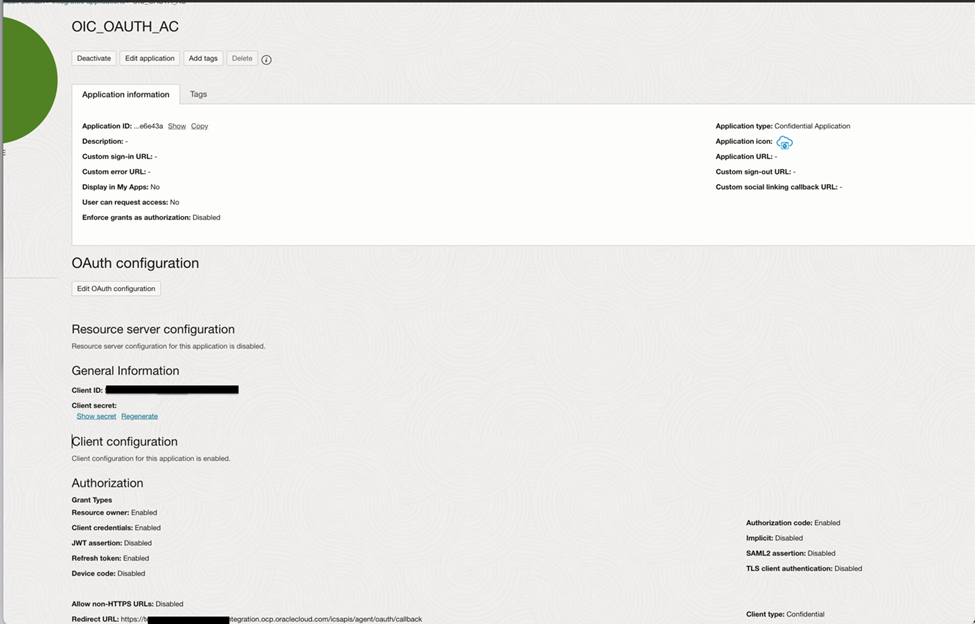
- Save and “Activate” the application.

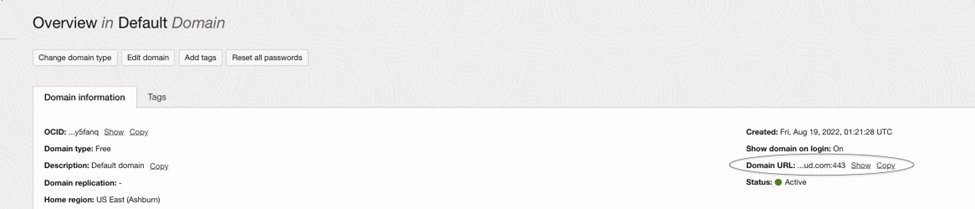
Obtain the Domain URL
- Navigate -> Identity & Security -> Domains -> Default (Overview)
- Copy the Domain URL to be used later in the OIC connection parameters
Assign the “Service User” role to the Confidential Application
- Navigate -> Identity & Security -> Domains -> (Default)
- Click on Oracle Cloud Services
- Click on the Integration cloud service instance

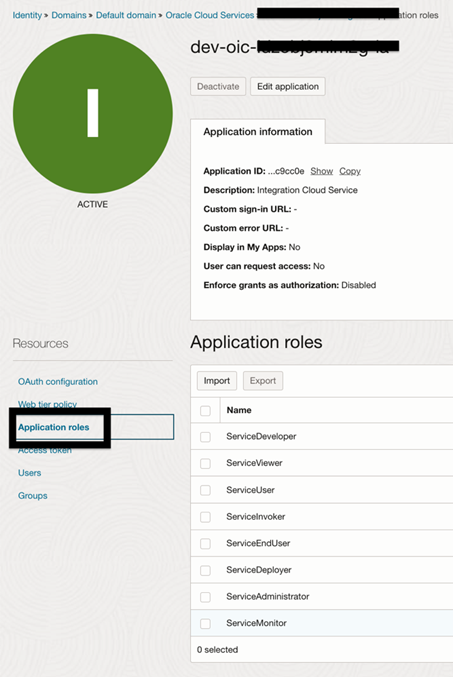
- Click on Resources -> Application roles.
- Expand the Service User role to manage user, role, and application assignment.

- Click on the link “Manage” against the “Assigned Application” and assign the OIC_OAUTH_AC confidential app that was created earlier.

OIC Connection Testing
- Navigate -> OIC Service Console -> Design -> Connections
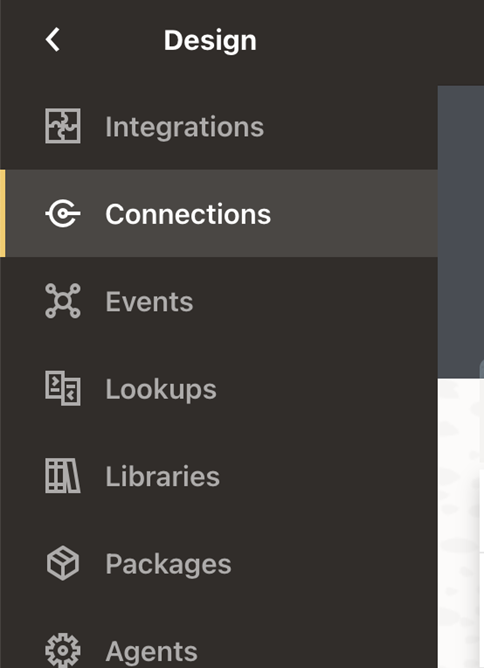
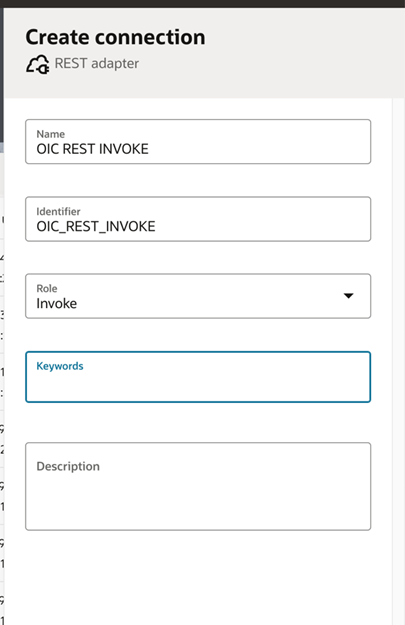
- Create a REST Adapter Connection
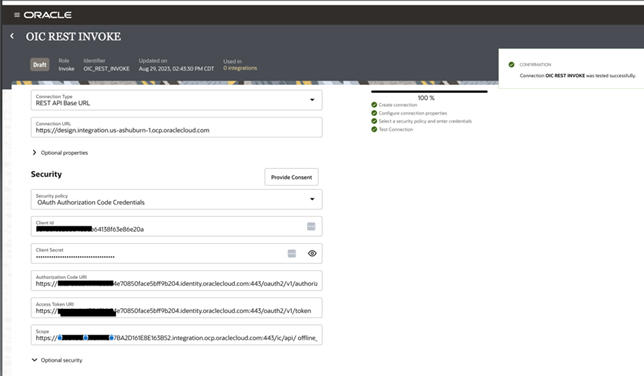
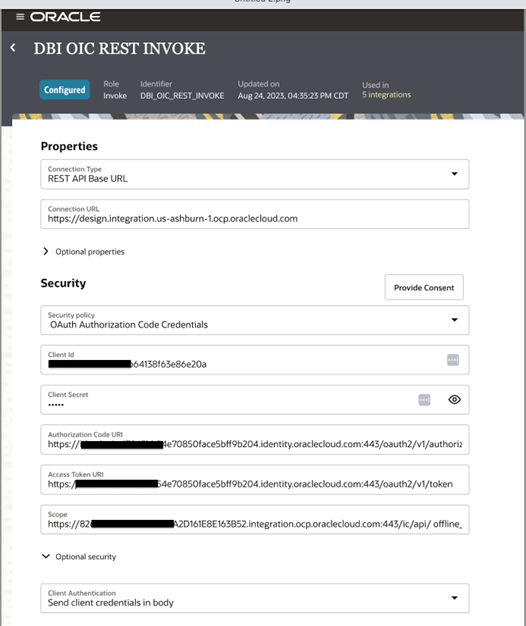
- Select the Connection Type as “REST API Base URL” and the Connection URL as https://design.integration..ocp.oraclecloud.com
- Under Security use the below values
| Name | Value | Comments |
| Security Policy | OAuth Authoriization Code Credentials | Type of the OAuth. |
| Client Id | xxxxxx | Client Id for the OIC_OAUTH_AC app |
| Client Secret | xxxxxx | Client Secret of the OIC_OAUTH_AC app |
| Authorization Code URI | https://idcs-xxxxx.identity.oraclecloud.com:443/oauth2/v1/authorize | URL where OIC will request for the authorization code |
| Access Token | https://idcs-xxxxx.identity.oraclecloud.com:443/oauth2/v1/token | Request should be sent to this above URI to get access token |
| Scope | https://<uniqueinstanceID>.integration.ocp.oraclecloud.com:443/ic/api/ offline_access | Use the scope values obtained from the “configure confidential application step”. There are two scope values separated by space |
| Optional Security: Client Authentication | Send client credentials in body |
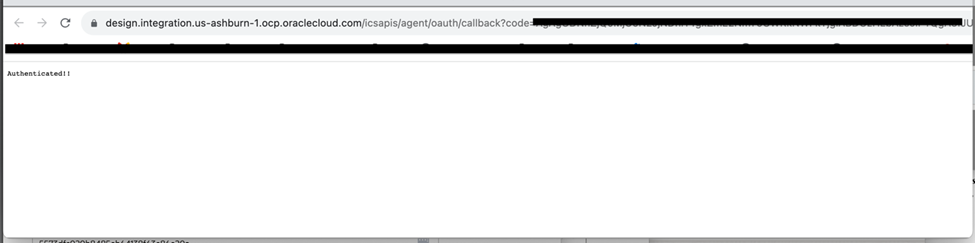
- Click on the Provide Consent. This will open another window and if successful then it will show “Authenticated”
- Once Consent is successful , click on the “Test button” to ensure that connection works.